

Using TTS (Text To Speech) on the Raspberry Pi, you can make it speak from text in natural speech. Especially if it is a fixed short sentence, it can be played back in near real time even with the performance of the Raspberry Pi.
It can be used in a variety of situations, but in industrial applications, it is an effective means for factory floors and other environments where sensors are used.
After receiving an anomaly from a sensor or a system event from a device, an alert is generated and can be notified by voice via TTS.
Even if the TTS is not integrated into an existing system, it can be linked to a Raspberry Pi equipped with TTS via API or other means to provide voice notifications and simple control.
In this issue, we will introduce speech synthesis software that can be used with the Raspberry Pi OS bookworm on the PL-R5m industrial Raspi, along with code examples.
Audio output
The PL-R5M industrial Raspberry Pi does not have an audio output jack; the Raspberry Pi 5 does as well, omitting the 3.5mm stereo jack, so it relies on the speakers on the HDMI monitor for audio output.
In environments where it is not connected to a monitor, no sound will be heard. In that case, use USB-connected speakers.
Useful commands to verify audio output:
# USB接続デバイスを調べる
lsusb
# デバイス番号を調べる
aplay -l
# Audioの出力先を調べる
sudo raspi-config
# サンプルサウンド再生
aplay /usr/share/sounds/alsa/Front_Center.wav
In this case, the output is from the monitor speakers connected to the PL-R5M.
Open JTalk
Open JTalk is a speech synthesizer for use with the Raspberry Pi that runs nimbly with little memory.
Installation is also easy since it is an apt command.
There are three to install.
- open-jtalk –> body
- open-jtalk-mecab-naist-jdic –> Dictionary data
- hts-voice-nitech-jp-atr503-m001 –> Acoustic Model
sudo apt update
sudo apt install open-jtalk open-jtalk-mecab-naist-jdic hts-voice-nitech-jp-atr503-m001
Supports package managers such as docker, homebrew, node.js, .
Run by command
Open JTalk can be run with commands. Run the following on a terminal screen by copying and pasting to see if there are any errors.
echo "おはようございます" | open_jtalk \
  -x /var/lib/mecab/dic/open-jtalk/naist-jdic \
  -m /usr/share/hts-voice/nitech-jp-atr503-m001/nitech_jp_atr503_m001.htsvoice \
  -ow out.wav
aplay out.wav- Option -x is the path to the dictionary file
- Option-m is the voice model used
- Option-ow is the output WAV file name
If a short sentence written in ECHO is heard instantly from the speaker, it is a success.
Command + short sentence to execute
It is more convenient to run the command as a shell script rather than specifying the argument options in the command each time.
Suppose you save the following code as jvoice-m.shand run it as sh jvoice-m.sh "こんにちは"in the same directory where the sh file is located.
#!/bin/sh
TMP=/tmp/jsay.wav
echo "$1" | open_jtalk \
-m /usr/share/hts-voice/nitech-jp-atr503-m001/nitech_jp_atr503_m001.htsvoice \
-x /var/lib/mecab/dic/open-jtalk/naist-jdic \
-ow $TMP && \
aplay -q $TMP
rm -f $TMP
If execution privileges are granted, it will be even shorter.
chmod +x jvoice-m.sh
./jvoice-m.sh おはようございます
Letting the user speak sentences that have been pre-filtered into text (shell scripts)
Next, if you want the reader to read a text that is a little longer than a short sentence, save it to a text file and load it.
Note that if the text is long, there will be a time lag until playback.
As an example, I tried two lines of a Wikipedia quote, and with the performance of the PL-R5m, which is equivalent to the Pi 5 and CM5, it played after about 1 second or so.
Open JTalk is a text-to-speech software developed at the Nagoya Institute of Technology for the Japanese language.
There are two versions: a stand-alone version available as open source and an online version available on the website.
Cited from: https://ja.wikipedia.org/wiki/Open_JTalk
Shell script content:
#!/bin/sh
WAV=~/jvoice.wav
TXT=~/voice_text.txt
echo "$1" | open_jtalk \
-m /usr/share/hts-voice/nitech-jp-atr503-m001/nitech_jp_atr503_m001.htsvoice \
-x /var/lib/mecab/dic/open-jtalk/naist-jdic \
-ow $WAV $TXT && \
aplay -q $WAV
This code does not let it be generated in a temporary file and then delete it, as was done earlier.
It is generated as jvoice.wav in the home directory and left intact.
Add female mei (mei) voice.
I will also add a female voice. ver. 1.8.
Under the Raspberry Pi environment, the directory taken from the zip file is placed in the specified directory.
wget http://downloads.sourceforge.net/project/mmdagent/MMDAgent_Example/MMDAgent_Example-1.8/MMDAgent_Example-1.8.zipAfter unzipping, move the file to /usr/share/hts-voice/.
unzip MMDAgent_Example-1.8.zip
sudo cp -R ./MMDAgent_Example-1.8/Voice/mei /usr/share/hts-voice/
Even though the code is the same as the male voice we just tried, we are trying it by changing the path, which is the argument of -m. (line 4)/usr/share/hts-voice/mei/
#!/bin/sh
TMP=/tmp/jsay.wav
echo "$1" | open_jtalk \
-m /usr/share/hts-voice/mei/mei_normal.htsvoice \
-x /var/lib/mecab/dic/open-jtalk/naist-jdic \
-ow $TMP && \
aplay -q $TMP
rm -f $TMP
The downloaded audio file “May” has five different styles for different emotions.
mei_angry.htsvoice (angry)
mei_happy.htsvoice (happy)
mei_sad.htsvoice (sad)
mei_bashful.htsvoice (bashful)
mei_normal.htsvoice (normal)
You can also try another female voice, tohoku-f01. You can use them by copying them to /usr/share/hts-voice/in the same way.
tohoku-f01: https://github.com/icn-lab/htsvoice-tohoku-f01
Running Open JTalk in Python
The following is sample code to be executed in Python code.python3 test_openjtalk.pySaved as
Example of use in subprocess:
import subprocess

# 入力テキスト
text = "こんにちは。ラズパイダからのお知らせです。"

# ファイルにテキストを書き込む
with open("input.txt", "w", encoding="utf-8") as f:
    f.write(text)

# Open JTalk のコマンド実行
# -m で声質ファイル (HTS Voice)、-x で辞書を指定
subprocess.run([
    "open_jtalk",
    "-x", "/var/lib/mecab/dic/open-jtalk/naist-jdic",
    "-m", "/usr/share/hts-voice/mei/mei_normal.htsvoice",
    "-ow", "output.wav",
    "input.txt"
])

# 再生(aplayコマンド利用)
subprocess.run(["aplay", "output.wav"])
When used with subprocess, it is lightweight and is played back immediately.
For short notification purposes, playback in aplay with subprocess is suitable. It is necessary and sufficient.
VOICEVOX
VOICEVOX, a free software that can also be used commercially, is another excellent text-to-speech software.
If you are using it on a Raspberry Pi, you can install the OSS version of VOICEVOX, which is different from the commercial version.
However, if you download the binary of the arm64 version as is, it will not work on Raspberry Pi due to dependency errors.
If used with Docker, it works without error.
Since the format is used via API, it is rather convenient for notifications.
To install and use VOICEVOX on a Raspberry Pi, just prepare the docker-compose.yamlfile and compose upafter installing docker. ( ~/VOICEVOX を作成して実行しました)
Docker installation:
curl -fsSL https://get.docker.com -o get-docker.sh
sudo sh get-docker.sh
sudo usermod -aG docker $USER

# ルートレス化(管理者権限(sudo)付与せずにユーザーで実行できるようにする)
sudo apt install -y uidmap
dockerd-rootless-setuptool.sh install
docker-compose.yaml:
services:
  voicevox:
    image: voicevox/voicevox_engine:cpu-arm64-latest
    container_name: voicevox
    ports:
      - "50021:50021"
    volumes:
      - ./voicevox_data:/workspace
    restart: unless-stopped
Container startup:
docker compose up -dWhen accessed on the specified port number ( http://localhost:50021/docs), it is displayed in the Swagger UI and can be used with the REST API.

In this case, the following Python code was used to set up and run the program.
The default (standard) Raspberry Pi OS does not include the requests module, so it is still installed with pip.pip3 install requests
VOICEVOX Python code example:
import requests
import subprocess
import os

VOICEVOX_URL = "http://localhost:50021"

text = "温度異常検知!設備を確認してください。"

# 1. audio_query
res = requests.post(f"{VOICEVOX_URL}/audio_query",
                    params={"text": text, "speaker": 14, "style_id": 0})
res.raise_for_status()
audio_query = res.json()

# 2. synthesis
res2 = requests.post(f"{VOICEVOX_URL}/synthesis",
                     params={"speaker": 14, "style_id": 0},
                     json=audio_query)
res2.raise_for_status()

wavfile = "voicevox_output.wav"
with open(wavfile, "wb") as f:  # バイナリ書き込み
    f.write(res2.content)

# 3. 音声再生
subprocess.run(["aplay", wavfile])
os.remove(wavfile)
In this code, the speakers can be specified in the “speaker” and “style_id” parameters of the audio_query; the exact same parameters must be used for synthesis.
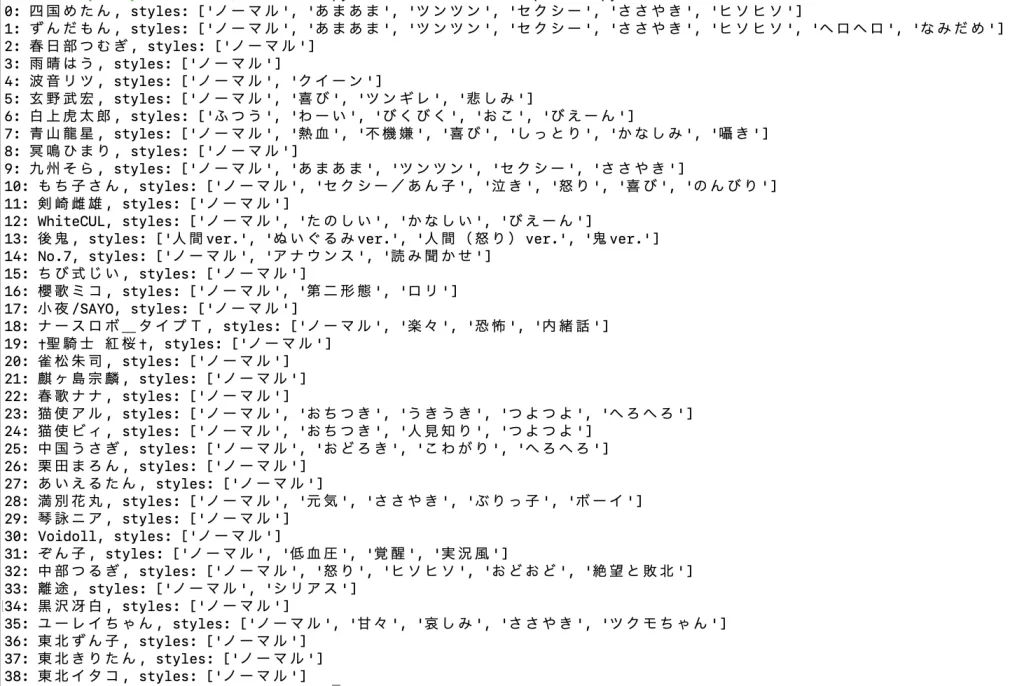
There were 39 different types of voices in VOICEVOX.
Speakers List:
When I ran it, the generated WAV played after a couple of seconds.
I have it playback with subprocess aplay, just like OpenJTalk.
It takes a little longer to generate, partly because VOICEVOX has better sound quality. The real-time system is slightly inferior, but the speech sounds more natural than OpenJTalk.
VOICEPEAK available for commercial use
Speaking of AI speech synthesis software that can be used commercially, the packaged product “VOICEPEAK” is well-known. Youtube videos using this voice have become commonplace.
In fact, it is also compatible with Raspberry Pi 4.
However, since this one does not support the CLI (command line), it cannot be used embedded in a program.
You can save the file as an audio file, so if you want to use a pre-made WAV file, you can call it up in the program.
Supported OS:
Windows 11/10 or later (64-bit)
macOS 10.13 or later
Ubuntu 20.04 or later (64-bit)
Raspberry Pi (Model: Raspberry Pi 4 / OS: Raspberry Pi OS (64-bit))
Since it cannot be called from a program, there is little advantage to using it on the Raspberry Pi.
Open JTalk for Raspberry Pi
In the end, with the performance of the Raspberry Pi, Open JTalk was the best choice: it is fast and easy for CLI as well as Python code with just subprocesss+aplay.
Even if you call it in shell scripts or Python, there is almost no delay with Pi 5 and CM5 series.
The fact that it can be installed with the apt package is one of the reasons why it is the best choice.
It is practical as TTS (Text To Speech) to make it speak for notifications if you work with the WEB API.
Open JTalk has not been updated since the end of 2018 but it is stable. I hope you will give it a try.
VOICEVOX is also useful to be able to choose the speaker’s voice, which can be changed depending on the situation. (Although the voice tone is too cute for business use…)

Article contributed by Raspida
Raspberry Pi information site that even non-engineers can enjoy using raspida.com a Raspberry Pi information site that even non-engineers can enjoy and handle. He also contributes technical blog articles to the PiLink site on the Raspberry Pi for industrial use.