
Partitions on external media can be modified while the system is running.
However, the partition that the OS is currently running from cannot be modified directly.
You must access it from another system.
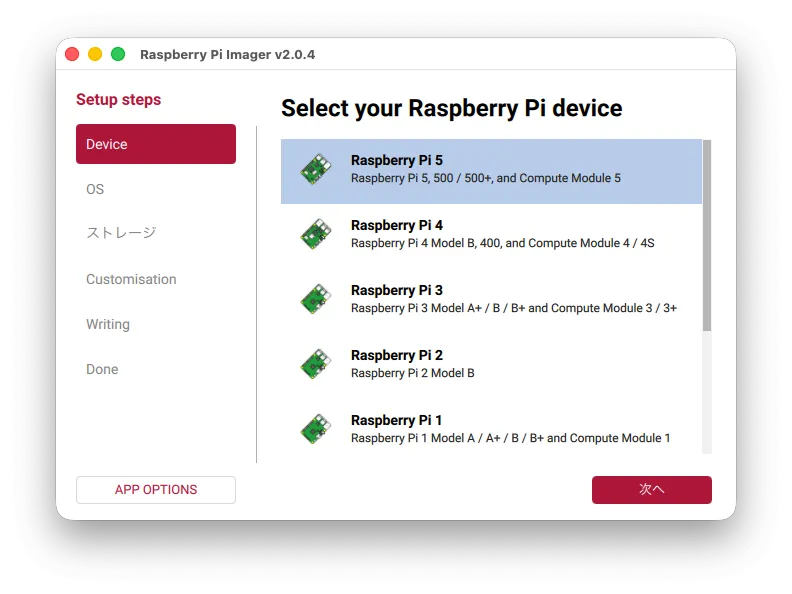
Here, the OS is written in Raspberry Pi Imager for use with Raspberry Pi devices such as Raspberry Pi 5 and CM5.
The same partitioning procedure can be used for the Raspberry Pi OS as well as Ubuntu Desktop.
Split into partitions
Instead of partitioning from scratch, write the OS as usual with the Raspberry Pi Imager.
Another partition is created after startup.
Raspberry Pi OS Write
Activate the written microSD card or other device as usual.
Once activated on the Raspberry Pi, it internally expands the area and the initial setup runs.
It doesn’t change anything visually, but it is important.
Update after startup
Once activated, you will see an update notice on your desktop to update & upgrade.
Then, exit and remove the microSD card.
This is because we will be working on creating partitions on another machine.
(2) Resizing and creating new partitions
*This section must be worked on a separate machine.
Why? The reason for reconnecting to another machine is that the area containing the running OS cannot be resized or edited. Therefore, another boot path must be secured, such as USB booting, either on a different machine or on the same machine.
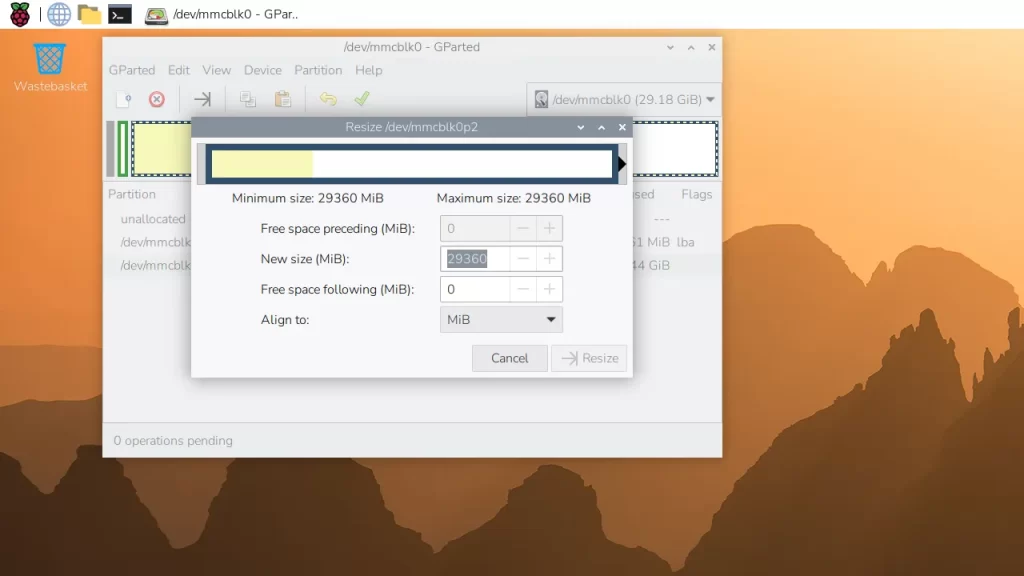
As you can see, when I try to manipulate the partition on the Raspberry Pi 5 side, it is grayed out and cannot be changed.
The following four patterns can be assumed as examples of environments for different machines to operate partitions.
Example of partitioning operation:
1. Boot GParted Live from the USB memory installed on your computer (Windows / Intel Mac) 2. (Windows / Intel Mac)
2. Install GParted Live on a PC with Linux installed (Linux native). (Linux)
3. Install Ubuntu using virtual software (UTM, etc.) and work with the standard Disks application, etc. (Windows/Linux)
4. Write another Raspberry Pi OS to a USB memory stick, boot it, insert a microSD card, and work. (Raspberry Pi)
Apple Silicon Macs are not eligible because GParted Live cannot be activated.
*Only methods 2 or 4 are supported for partition operation of eMMC-equipped models such as CM4/CM5.
The third one may seem a bit complicated.
Since the Raspberry Pi is USB bootable, you can write another Raspberry Pi OS to a USB flash drive and boot from that. Gparted is not Live.
- MicroSD card with Raspberry Pi OS on it (the side to be partitioned)
- USB flash drive with Raspberry Pi OS (Gparted installed)
We also tried UTM, and Gparted was unable to do so due to a glitch in timing, but we were able to do so with the standard tool, Disks.
(macOS 26 + UTM + Ubuntu 25.10 environment)
Since virtualization is less reliable, we would like to have a separate Linux-based PC.
Partitioning
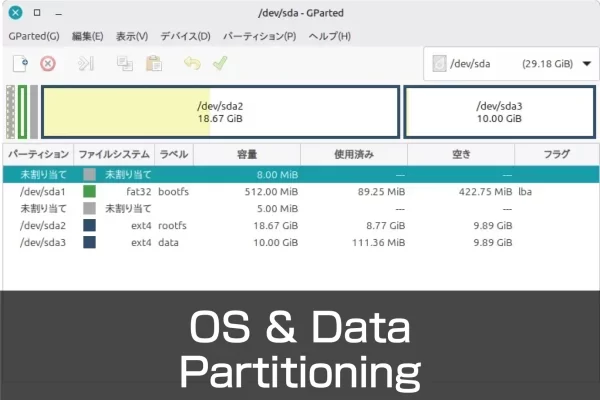
The partitions initially look like this
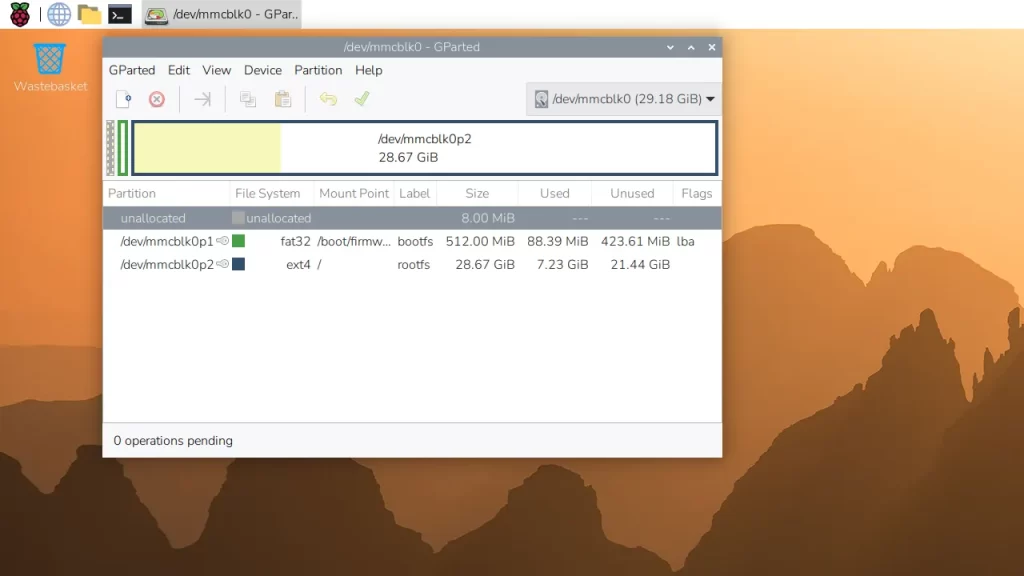
Divide this /rootfs into two parts.
In fact, it is divided by shrinking the existing partition from the beginning to create free space and then creating a new partition on it.
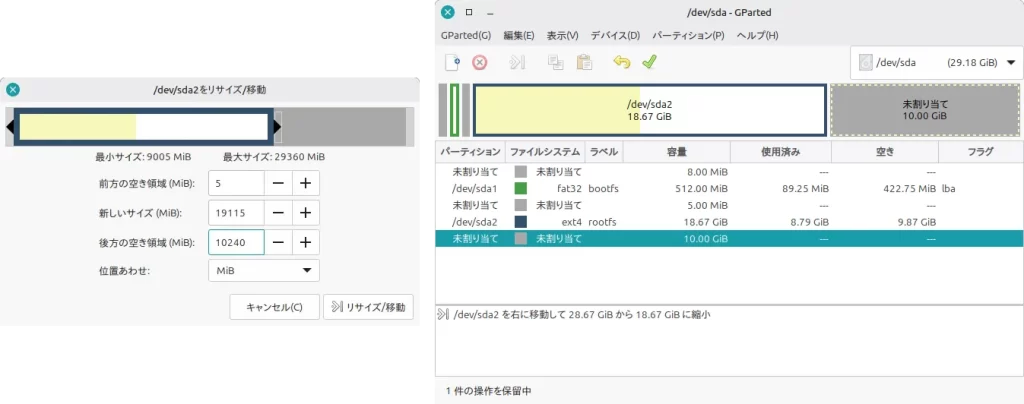
– Shrink 10GB backward from rootfs(p2)
– Create data(p3) in the free space
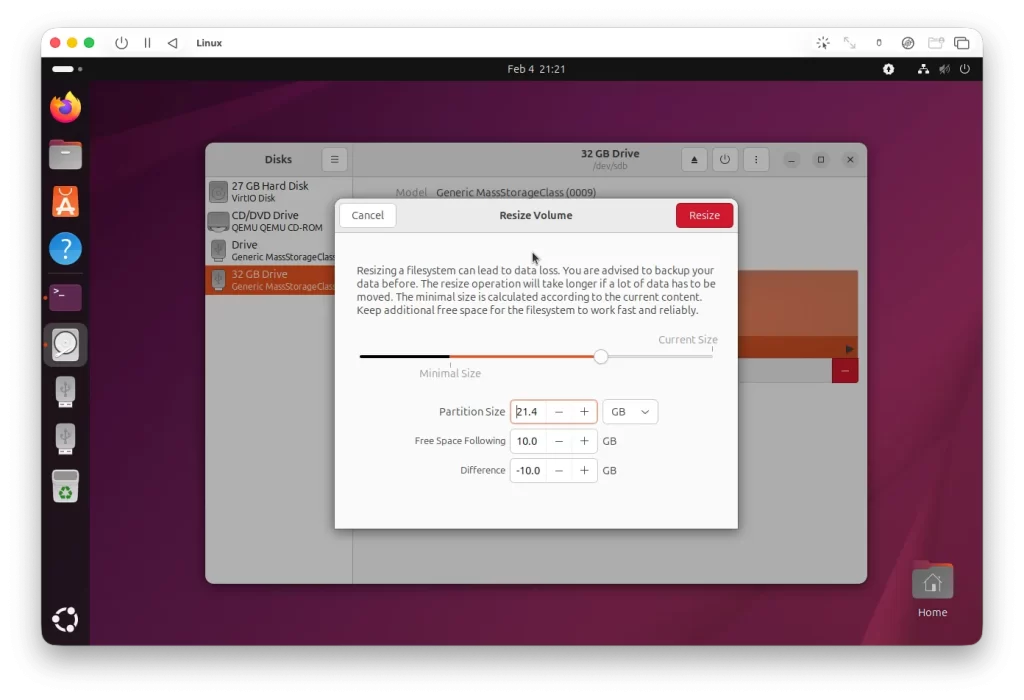
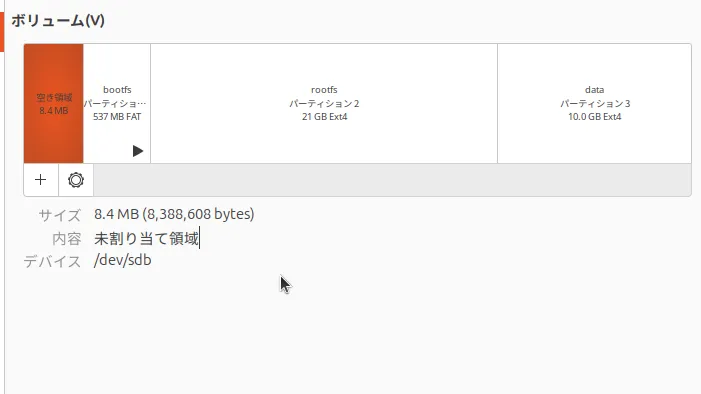
Here is a screen shot of the Ubuntu tool Disks.
I set it at 10,240 MiB since it is 10 GB.
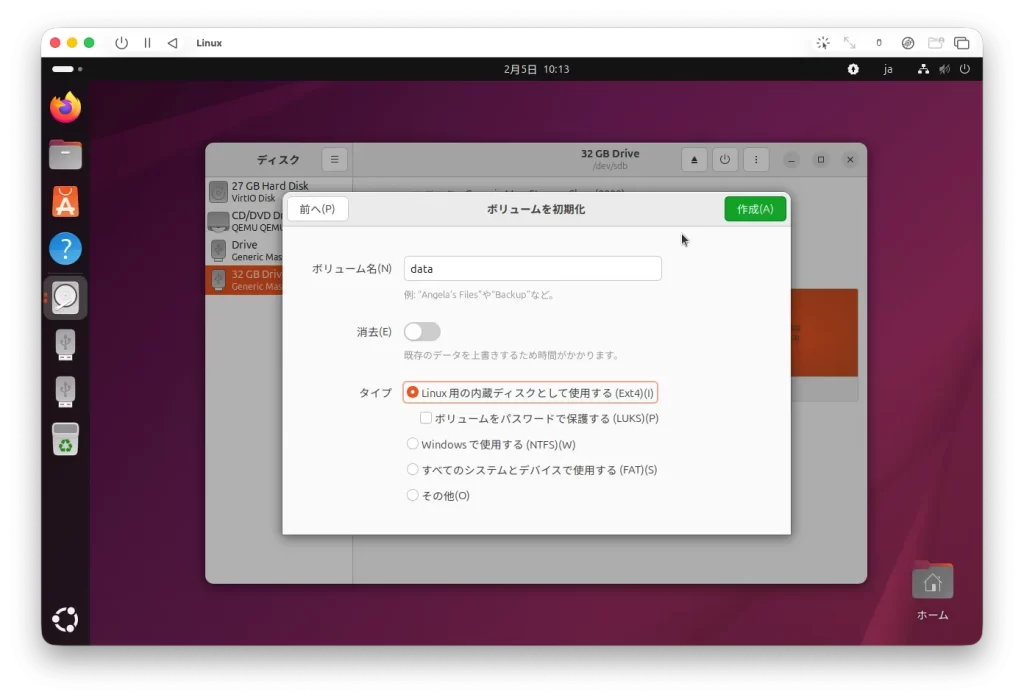
The newly divided partition should be prepared in ext4 for Linux.
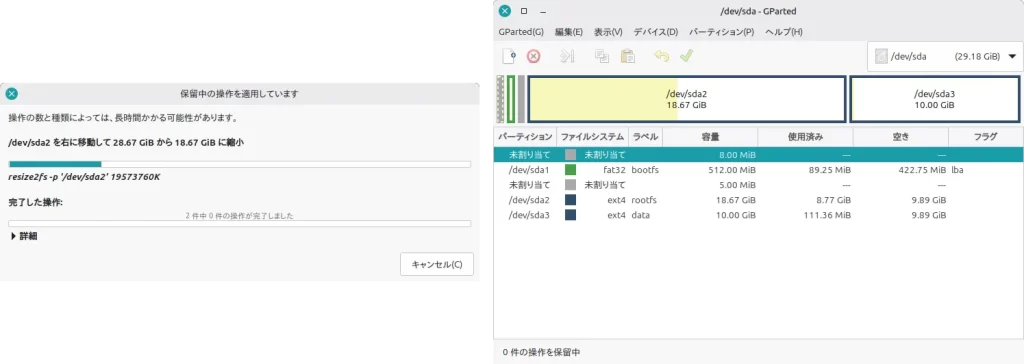
The division is now complete.
Put it back into the Raspberry Pi again, boot it up and check it.
lsblkcommand, df -hcommand, etc. are easy to understand.
Raspberry Pi Compute Module system
The eMMC of the Raspberry Pi Compute Module system, which is used in the industrial Raspberry Pi, runs rpiboot and recognizes it as must storage.
However, the eMMC cannot be mounted in a Gparted Live environment because rpiboot cannot be performed.
Therefore, a separate device for the Linux environment is prepared and operated.
In this case, we worked on a PC with Linux Mint and Ubuntu 25.10 on UTM on macOS.
A native Linux environment is required, either on a real machine or virtualized.

Article contributed by Raspida
Raspberry Pi information site that even non-engineers can enjoy using raspida.com a Raspberry Pi information site that even non-engineers can enjoy and handle. He also contributes technical blog articles to the PiLink site on the Raspberry Pi for industrial use.